So this must be the appropriate place to start, right? My brother first made this a long(ish) time ago. I don’t know, let’s say five years ago (you can find his recipe, in Swedish, here). I think he read about it on a Swedish blog but I’m not really sure. Anyway, it kinda became a thing in our circle. I then decided to do it one of the first times we had Danilo and Maria over for dinner, serving it with something that my father introduced me to: salt and olive oil on ice cream (which he in turn got from some place,
 probably Mathias Dahlgren actually Jamie Oliver). And it continued to be kind of a thing. It became something fun to serve new people and then annoyingly ask: ”…what do you think it is..? Guess!” (it really is pretty rare that it’s fun when someone asks you to guess, but… I’m naively open to the possibility that it might not always have been annoying).
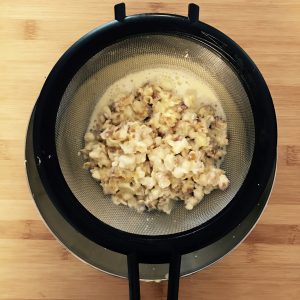
So why the fuss, you might rightly ask. This just sounds like a hipstery over worked, over hyped, over well… this just sounds like the sorta thing that’s gonna be over pretty quickly, right? Not a thing that becomes something more than a fun (pretentious) little (annoying) thing? Buuuuut, listen, I know popcorn ice cream sounds weird, but the weird part is actually that it’s not weird at all. It’s just a really, really good flavouring for ice cream!
Quite frankly, it’s my favourite ice cream. And despite attempts to find a conceptually appropriate pairing, e.g. coca-cola sauce, I think salt flakes and olive really hold its ground against the alternatives. And you know what? I know it sounds weird, but the weird part is that it’s actually… yeah, you know where I’m going with this. It’s just great.
And so what if all the above makes me look like a bit of a quirky foodie type guy, can’t that just be ok?
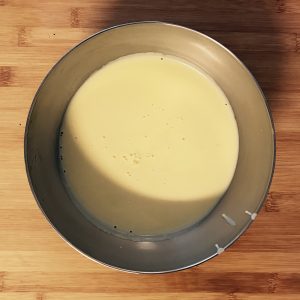
Time-wise: if you have a fancy ice cream maker: ca 2 hours. 1.5 hours of prep, ca 30 (eh, maybe 40) min in the machine. Explain fancy! Fancy means active cooling. Cheaper ice cream makers have cooling blocks that have to be frozen in preparation to making the ice cream. In addition, with these machines you normally have to cool the batter before putting it in the machine. With an active cooling aggregate you can put warm batter in the machine (at least the one I have). I do think however, that results improve if the batter is pre-cooled, also in the case of active cooling. So:
If you have an freezing block style ice cream maker: Ca 4 hours. 1.5 hours of prep, 2 hours to let the batter cool down, 30 min (ish, very dependent on the actual machine) in the machine.
Ideally, regardless of machine, it’s preferable to make the batter the day before and stuff it in the fridge overnight.
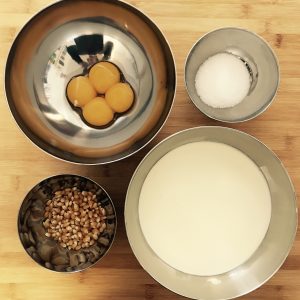
Let’s get down to it shall we?